FAQ
General
We often get asked about the benefits of using SMS for the distribution of our e-learning courses. The answer to that question has two aspects:
- With SMS, we have a phone number, which allows us to directly identify the learner. As a result, a login procedure is no longer necessary. The phone number serves as the login. This makes it easy and straightforward to enable hard-to-reach employees to engage in learning.
- The second reason is more technical. SMS distribution channels (the mobile phone providers) provide us with immediate delivery data. This means that we receive information about the delivered message – the e-learning content – right away. We can see when the message was sent and when it was delivered to the phone. We combine this data with the e-learning course data and log it into our Learning Management System (LMS). This gives us insight into the entire distribution process, which is valuable for compliance, and also helps us track results!
Curious about how this works? We’d be happy to provide you with a demo.
Recently, in a Product Demo from LesLinq (sign up here), we received the following question:
“If someone provides an incorrect answer in LesLinq, can I include a link in the feedback to more information on the topic?”
Scenario-Based Learning:
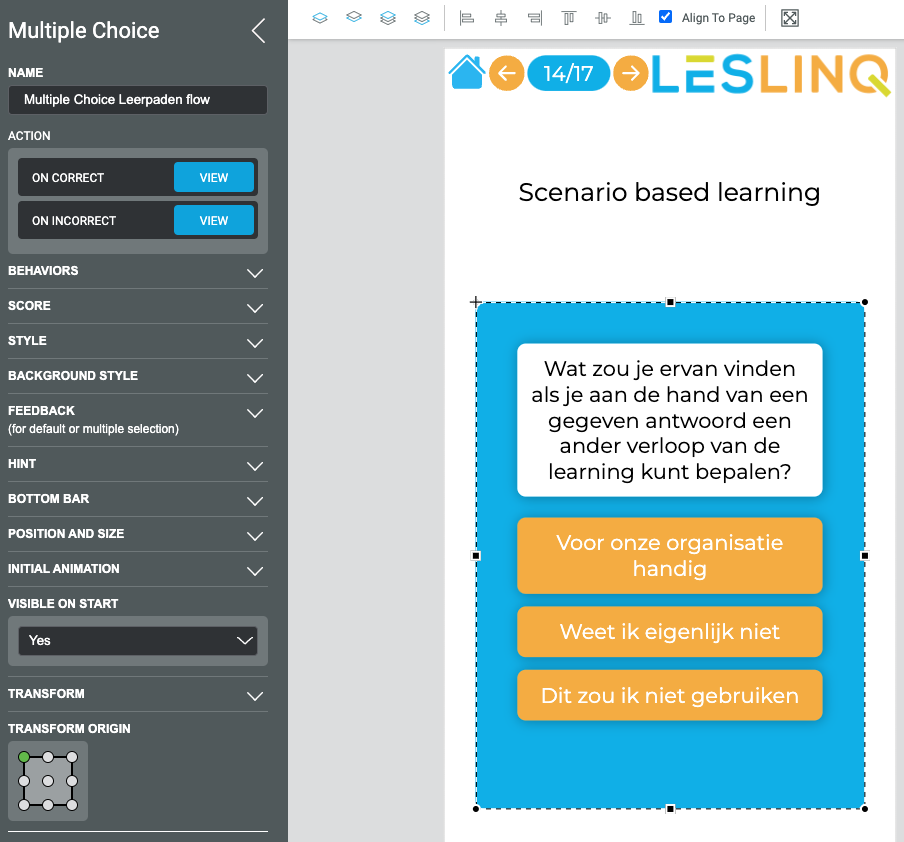
Yes, in LesLinq, you can design ‘scenario-based learning.’ Because LesLinq offers 100% freedom in design and interaction (the ‘flow’ of the lesson), there are even multiple options available in this scenario.
In LesLinq, you can link an ‘action’ to everything. When you want to use scenario-based learning, you set up an action based on the given answer. If an answer is correct (or incorrect), you can set up a specific flow to, for example, a certain series of slides with more information, a video, images with or without audio, a piece of text, etc. The possibilities are vast.
How does this work?
ACTION
‘ON CORRECT’
‘ON INCORRECT’
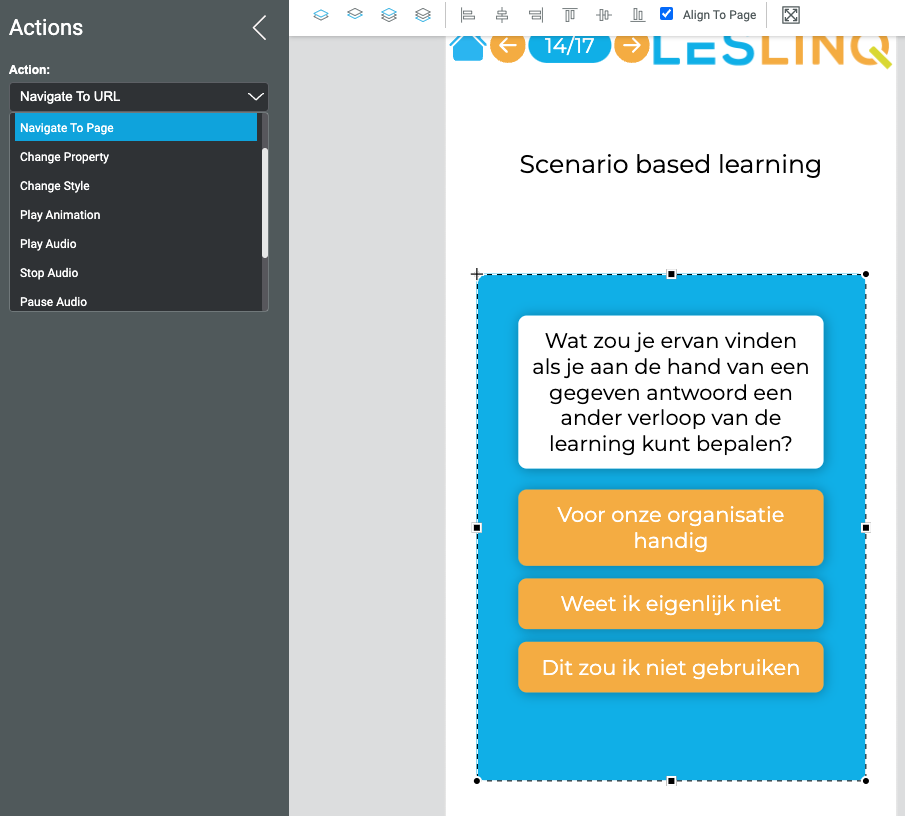
The action can be:
- Navigate To URL (external link)
- Navigate to Page (internal series of slides or individual slide with information)
- Change Property (visibility/placement/scale, etc.)
- Change Style (color/formatting)
- Play Animation (slide/fade/zoom)
- Play/Pause/Stop Audio
- Play/Pause/Stop Video
At the end of the flow, you can go back to the question, continue with the learning, or proceed with another learning path within the learning, and so on—whatever you prefer.
Yes, the online tool is completely in English.
It sometimes happens that the projects don’t load properly after you’ve logged in. The best thing to do then is to clear your browser cache and delete cookies.
Why Clear Cache and Cookies?
Clearing the cache and cookies from a web browser is an important first-step for almost any troubleshooting for internet browsing. The ‘cache’ is a tool used by your internet browser to speed up the page loading process. However, sometimes it can cause a problem when websites are updated and developed as files saved in the cache may conflict with what’s actually coded into the website. Clearing cache and cookies is often the first step you take to solve problems. By clearing your cache regularly, you force your browser to start over and you can be sure to see the latest pages and data.
Keyboard Shortcut for Most Browsers
If you are using Internet Explorer, Edge, Google Chrome, or Mozilla Firefox you can quickly clear cache with a keyboard shortcut. While in your browser, press Ctrl + Shift + Delete simultaneously on the keyboard to open the appropriate window.
IMPORTANT: Be sure and close/quit the browser and restart it after clearing the cache and cookies.
Of course, you want the loading time of your project to be as short as possible. No one has the sense and time to wait for a page to load. Using images that are too large is a major cause of long loading time. Reducing your images will make the web page load and display faster in web browsers.
There are several ways to resize an image without losing image quality. Our 2 (free) favorites:
- Ctrl + s -> Save
- Ctrl + z -> Undo
- Ctrl + Shift + z -> Redo
- Ctrl + a -> Select all
- Arrow keys -> Move elements by 1 px
- Shift + Arrow keys -> Move elements by 10 px
- Ctrl + g -> Group selected elements
- Ctrl + Shift + g -> Ungroup slected group
- Ctrl + c -> Copy element
- Ctrl + v -> Paste element
- Ctrl + Shift + v -> Paste element in place
If you hold down the CTRL key, you can select an upper layer
How to
LesLinq offers multiple ways to navigate between different pages. For example through the functions ‘Swipe Through’ and ‘Next/Previous’ (you can turn these on and off in the Project Settings). You also have an option in the Actions to navigate to the previous or next page.
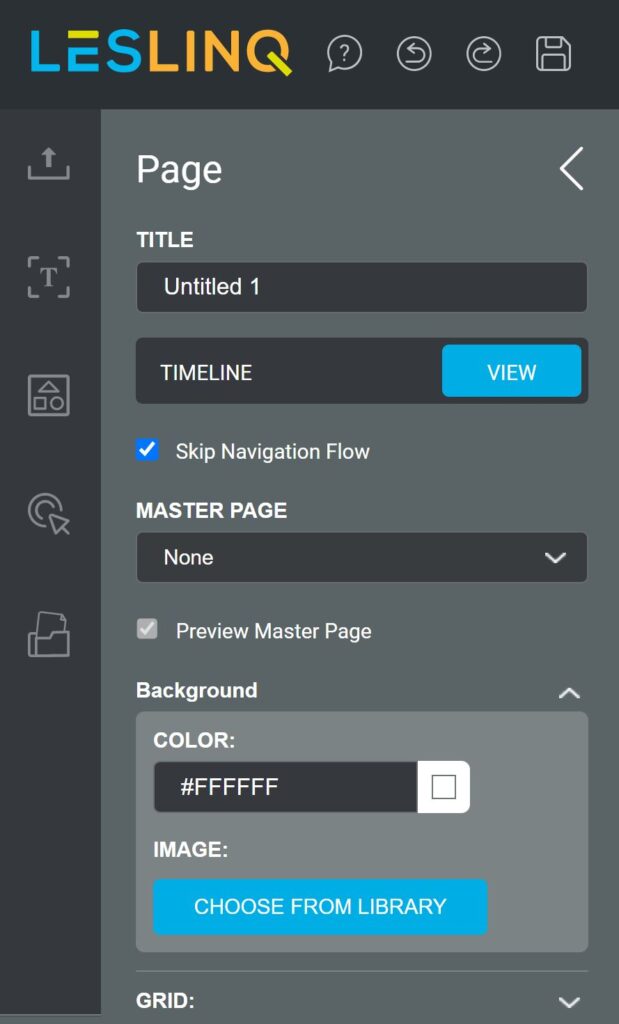
You might, however, want to exclude a particular page from the default “navigation flow. This is possible. You can set this per page in the Page Settings. This can be done by checking the ‘Skip Navigation Flow’ checkbox. When the box is ticked, the page is removed from the navigation flow. It will now only be shown when you specifically link to this page (for example by setting the Actions box to navigate to this specific page in case of a certain action).
Adding a hyperlink to an element works as follows:
- In the canvas, double-click the element you want to add the hyperlink to (the image, button, shape, video, etc). The propery panel will now open.
- In Actions, click the VIEW button next to On Mouse Click.
Select ‘ADD KEYFRAME’.
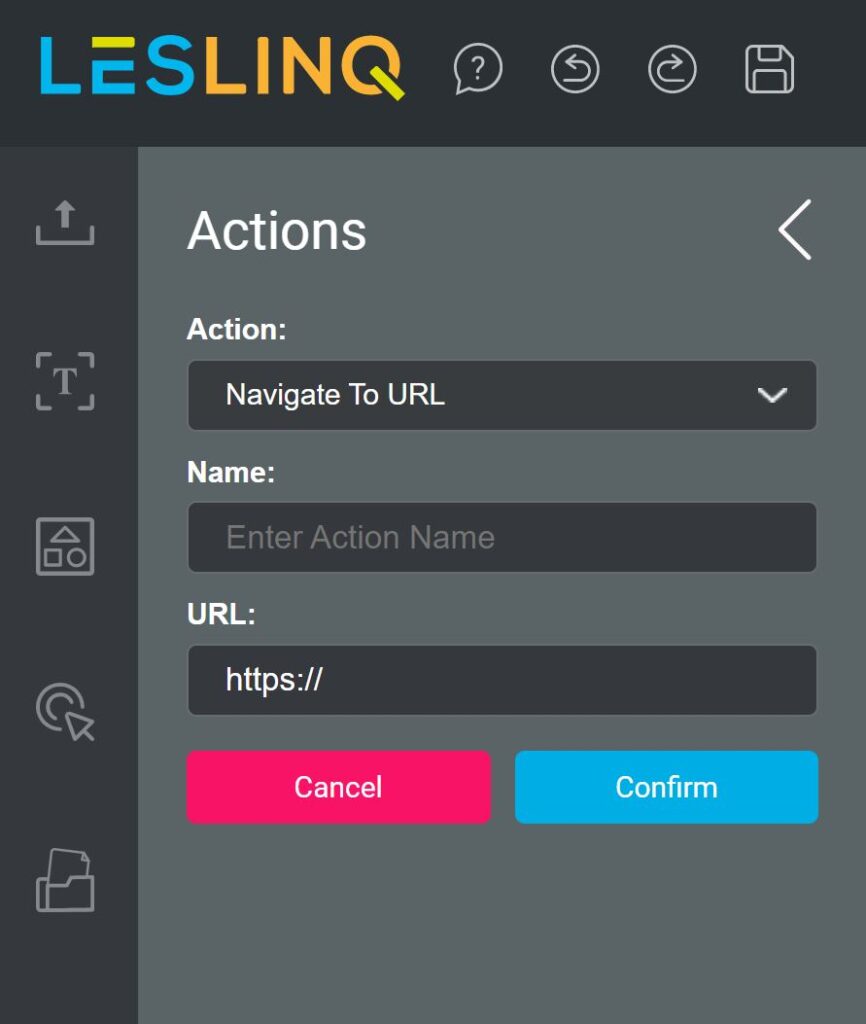
Select ‘ADD ACTION’. Optionally, under Time you can enter a time when you want the action to happen. When adding a hyperlink, Time will usually be set to 00:00:00.- Select ‘Navigate to URL’
- If desired, you can give the action a name (optional).
- Enter the URL you want to link to.
- Klick on ‘Confirm’.
- The hyperlink is now added and automatically opens in a new tab.
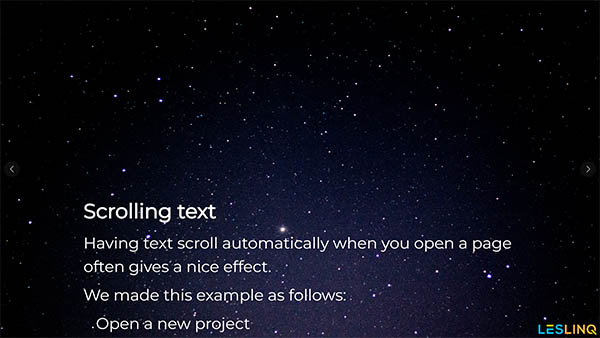
Having text scroll automatically when you open a page often gives a nice effect. This is also possible in LesLinq. See an example here.
Scrolling text in LesLinq
We made this example as follows:
- Open a new project
- Add a fullwidth image to your canvas
- Add a text block. If you want all text to scroll out of the screen, place the text block at the top of the screen, just outside the canvas. In the properties panel, you will see a negative Y value at ‘Position and Size’.
- Go to the properties of the textblock (select the text box and click in the bottom left corner at the properties icon). Use the following setting for Initial Animation (you can play with these values to get your desired result):
- Animation: Slide in from bottom
- Duration: 30 seconds
- Delay: 1 second
- Easing: none
When you’ve added a video or an audio file to a page and you want it to play automatically when the page is viewed, use the following setting.
- Open the page settings of the page where your video or audio file is placed. You can do this by doubleclicking on the page at the right side of your screen. Click on the ‘VIEW’ button next to ‘Timeline’.
- Click on ‘Add keyframe’
- Select the time at which you want the video or audio file to start playing. By chosing 00:00:00 it starts directly when the page is active. If you want to have it started with a delay, fill in the delay time.
- Click on ‘ADD ACTION’
- Select ‘Play video’ or ‘Play audio’
- Give your action a name (optional)
- Select the file you want to autoplay
- Save your action by clicking on ‘CONFIRM’

Please note: Several browsers (Chrome, Edge, Firefox, etc.) do not allow autoplay. In that case the user must provide a so-called ”manual interaction” before a video or audio will consistently play properly. In that case permission must be given to autoplay the media files. Once the permission has been given, the other videos and audio files are (mostly) played automatically.
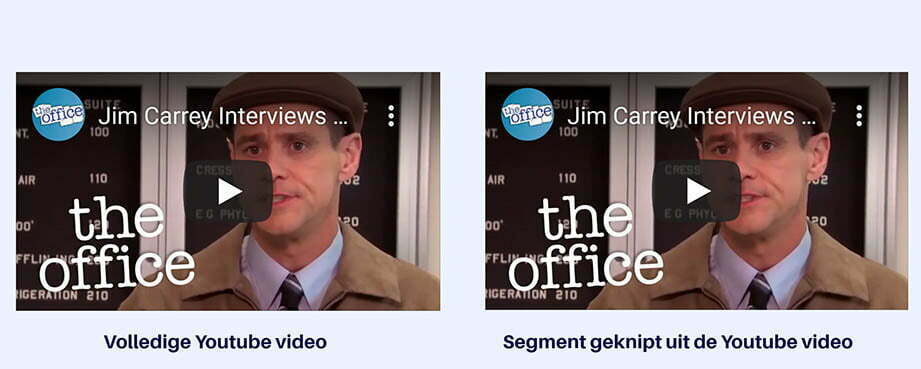
That you can use YouTube videos in LesLinq you may already know. But did you also know that you can choose to share not the whole video, but only a fragment of a video? This works as follows:
- Place the YouTube video in your canvas by copying and pasting the link;
- In the editor of the video player, enter the start and end time of the desired segment;
- Click on ‘Save’.
Through this link you can find more explanations in LesLinq and see an example of the final result.
Animations
When you add an image to the canvas, you can add various actions to it. You can choose from the following actions:
- Navigate to URL
- Navigate to Page
- Change Property (move across x and y axis, scale, rotate, transparency or invisible)
- Change Style (switch to another image, change fill or stroke colour)
- Play Animation (blur, zoom and various options to move the image)
- Play Audio
- Stop Audio
- Pause Audio
- Play Video
- Stop Video
- Pause Video
In the Keyframes you can set at what time the action should occur.
When you want to set up an Action, you have to deal with Keyframes. Simply put, a Keyframe is a time when one or more actions can be performed. You can add a Keyframe (with Action) to an element (image, button, shape, video, etc) as well as to a page. You can set multiple Keyframes at different times. You can link one or more Actions to each Keyframe. For example, you can set an element to play a video at 1 second, stop the video at 20 seconds and navigate to a certain page at 21 seconds.
Actions you can link to a Keyframe are:
- Navigate to URL
- Navigate to Page
- Change Property
- Change Style
- Play Animation
- Play audio
- Stop Audio
- Pause Audio
- Play Video
- Stop Video
- Pause Video
When you have set up multiple Keyframes with Actions, you can see them at a glance in the Action Settings. In short, a hugely useful feature, giving you many opportunities to create interactive content

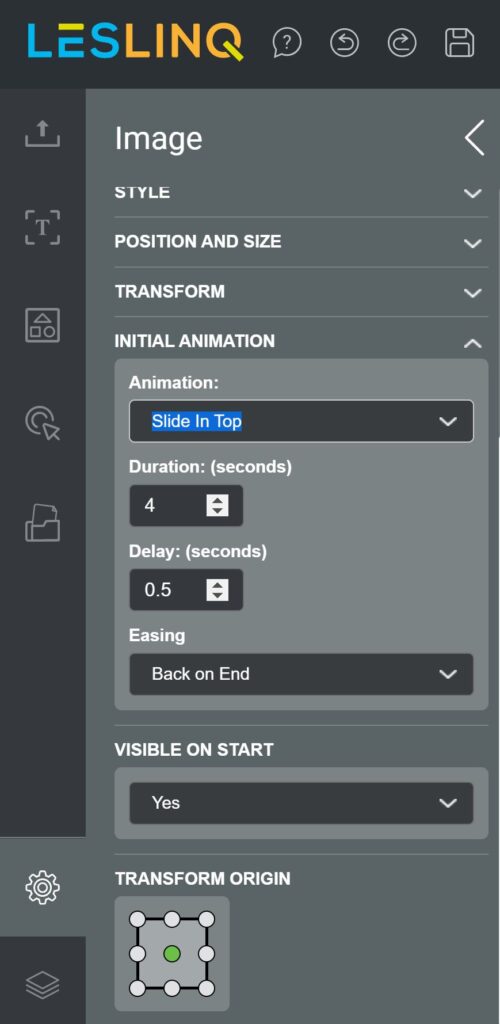
For each element (image, button, shape, video, etc.) that you add to your canvas, you can control how it appears on screen. You set this via Initial Animation. The settings of Initial Animation can be found in the ‘Properties’ of the element. You open the Properties by double clicking on the element in the canvas, or by selecting the element and clicking on the cogwheel icon in the lower left corner. The property panel will now open.
Scroll down to the Inital Animation Settings and select:
- None
- Slide in Left
- Slide Out Left
- Slide in Right
- Slide Out Right
- Slide in Top
- Slide Out Top
- Slide in Bottom
- Slide Out Bottom
- Fade in
- Fade Out
- Zoom In
- Zoom Out
- Custom Fade
- Custom Zoom
At ‘Duration’, set the duration of the animation
At ‘Delay’ you determine at what time the animation starts
At ‘Ease’ you determine the animation settings at the beginning or end of the animation. You can choose from:
- None
- Ease on Start
- Ease on End
- Ease on Start and End
- Back on Start
- Back on End
- Back on Start and End
In this way you can set the Inital Animation of each element separately.
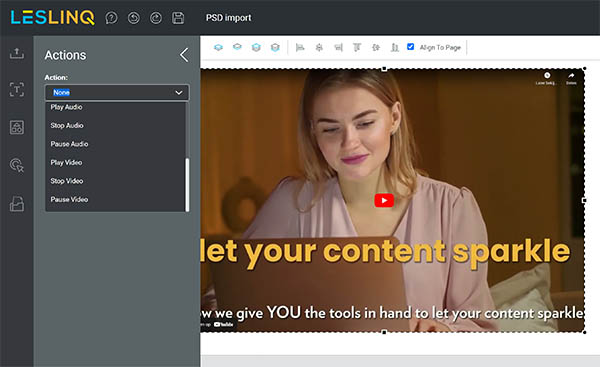
By adding actions you can make a video even more interactive and keep the attention of your audience. Possible actions you can add are:
- Navigate to URL
- Navigate to Page
- Change Property
- Change Style
- Play Animation
- Play Audio
- Stop Audio
- Pause Audio
- Play video
- Stop video
You can ad dan action by doubleclicking on the video in your canvas. Click on the ‘VIEW’ button next to Timeline. Select ‘ADD KEYFRAME’. Select the time at which you want the ation to happen. Click on ADD ACTION and select the desired action. Give your action a name (optional). It is possible to add multiple actions at the same time or to add multiple actions at different times.
Integrations
LesLinq integrates with ReadSpeaker, a powerful text-to-speech technology that automatically reads the text on screen aloud. With a wide range of languages and diverse voice options, you can choose between live audio streaming or producing separate audio files for voice-overs. Want to know more? Get in touch with us today!
Yes, there are several ways to integrate LesLinq with an LMS. The way this is done depends on the LMS you are working with. It is possible to download projects as HTML5 for use in your own LMS, or to link LesLinq with an LMS via an API link. Please contact us if you have any questions about this.
Is your question not listed?
Let us know. We’d be happy to help.